
Aluminum Wheelchair Ramp Installation
What is the method of aluminum wheelchair ramp installation? I think aluminum wheelchair ramps are a great, strong choice to make homes and public areas easier to get into. From my experience, they work well for people using wheelchairs, those needing help moving around, and caregivers who need safe, dependable access. Compared to wood or concrete, I find aluminum wheelchair ramps are lighter, don’t rust, and need less upkeep.So how do we install an aluminum wheelchair ramp?
Required Tools for Aluminum Wheelchair Ramp Installation
To install an aluminum wheelchair ramp safely and correctly, you need the right tools. Based on my experience, using the tools I suggest makes the aluminum wheelchair ramp installation job easier. It also helps make sure the ramp is strong and safe. Here’s a list of what I find you’ll need for most modular aluminum ramps. This list works well for the popular PATHWAY system aluminum wheelchair ramp installation.
| Tool/Equipment | Description |
|---|---|
| Cordless drill | Speeds up putting the ramp together. Works great on thick aluminum pieces. |
| 5/16″ drill bit | Needed for drilling exact holes. |
| 5/32″ and 3/16″ Allen wrenches | Used to tighten the ramp connectors and other hardware. |
| 9/16” and 1/2” socket with ratchet | Helps ensure all bolts are fastened tight. |
| Phillips driver | Helpful for assembling smaller ramp parts. |
| Hacksaw or tube cutter | Needed to cut aluminum ramp pieces to the right length. |
| Hand saw or Sawzall (optional) | Provides more cutting power for custom fitting pieces when needed. |
| Tape measure (25’ or longer) | Used for accurate measurements. |
| 4’ level or laser level | Helps achieve a completely level ramp surface for safety. |
| String line/line level | Useful for checking if long ramp sections are straight. |
| Rubber mallet | Gently taps parts together without causing damage. |
| Construction adhesive (as needed) | Used for extra grip on certain surfaces. |
| Small spade/digging tools | Handy for leveling the ground or putting in ramp legs. |
| Sand for leveling (optional) | Helps create a solid, level base for the ramp. |
How I Install a Wheelchair Ramp Platform: Making It Stable and Safe
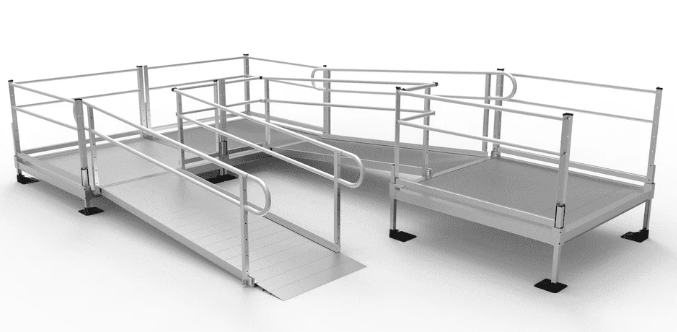
When I install an aluminum wheelchair ramp platform, I always start with a stable, flat spot. This is important because it stops the ramp from wobbling later. You’ll often find platforms in sizes like 4’x4’, 5’x5’, and 5’x6’. Based on my experience, these platforms can hold up to 1,000 lbs. This weight capacity works well for homes and public places. When you place the platform, leave enough room to attach the ramps. Also, make sure there’s space for turning, following ADA rules for accessibility.
To install, slide the 1.5”–2” support tubes into the platform’s corners. Then attach the base feet fully beneath the platform to avoid tripping. Their wide plates spread the weight and improve stability.
Make sure all thumb screws are tight. For soft ground, place feet on concrete pads (minimum 12”x12”x2”) to prevent sinking. Test the platform for stability before moving on.
Leveling is done by adjusting one leg at a time—loosen the screw, shift the leg, and retighten. I aim for less than 1/4” variance across the surface to meet ADA standards. Platform height is usually adjustable from 12” to 60”.
Installation takes 30–90 minutes depending on site conditions. Basic tools like a wrench, screwdriver, and level are all you need. Follow these steps, and your platform will be safe and long-lasting.
My Guide to Safely Joining Aluminum Wheelchair Ramp Platforms
Connecting platforms right is key in aluminum wheelchair ramp installation. I believe doing this step carefully is vital for safety. It also helps with long-term stability and meeting ADA rules.
Step-by-Step Guide for Connecting Aluminum Platforms
Attach Bracket: I slide the connector bracket up to touch the platform corner.
Tighten Bracket: I secure it firmly.
Place Second Platform: I set it on the bracket and align it.
Insert Short Leg: I slide a short leg through both corners.
Tighten Screws: I tighten all set screws—no skipping.
Add Bridge Plate: I place a 3″x32″ bridge plate at every joint.
Install U-Legs: I always add support legs where ramps connect.
Leave Clearance: I keep a 3” gap for handrails and safety.
Ramp Installation
Proper ramp installation ensures safety and ADA compliance. I start by preparing all parts: ramp sections, platforms, U-leg supports, hangers, bridge plates, and support tubes. Tools include Allen wrenches and a tape measure. I lay leg supports from tallest to shortest to save time.
Next, I measure the support leg height (platform height minus ramp rise). For stability, I often choose the next leg size up. I install the legs into brackets and foot plates, keeping them vertical, and level the side rails before tightening everything.
To attach ramps, I fit the male lip into the platform groove, leaving a 3” gap for handrails. I always use U-legs at every ramp-platform joint for added support, even if the fit looks good. I install bridge plates (3″x32″) at all joints to prevent wheel gaps, and check slope ratios for ADA compliance (no steeper than 1:12).
At the ground, I use a transition section, securing it when needed. For longer setups, I use splices to join ramp sections and brackets to connect platforms with short legs for added support.
I double-check all screws, secure ramp feet, use concrete pads on soft ground, and mark hazards. These steps keep the ramp safe and solid.
ADA Compliance for Aluminum Wheelchair Ramps
Following ADA rules keeps ramps safe and avoids legal issues. I always follow these key requirements in aluminum wheelchair ramp installation:
Slope: Ramps must not be steeper than 1:12. For every inch of rise, there should be at least 12 inches of ramp.
Width: The clear width must be at least 36 inches for wheelchair access.
Landings: If a ramp is over 30 feet long, I add a level landing that meets ADA size rules. This gives users a safe place to rest.
Handrails: Required on both sides if the ramp rises over 6 inches. I ensure they meet ADA height and grip standards.
Edge Protection: I install curbs or barriers on all open sides to prevent roll-offs.
Surface: I always use ramps with a non-slip, firm, and stable aluminum surface—especially important in wet weather.
Permanent Installation: I fix the ramp securely unless it’s for approved temporary use.
My ADA Ramp Checklist
✓ 1:12 slope or gentler
✓ 36″ minimum width
✓ Landings on long runs
✓ Handrails if rise >6″
✓ Edge barriers in place
✓ Non-slip surface
✓ Ramp is firmly attached
Following this ensures safety and compliance every time.
Ground Transition Installation for Aluminum Wheelchair Ramp Installation
I always place the ground transition at the ramp’s end for a smooth, safe entry to the ground. I ensure all parts fit tightly to avoid gaps, then secure them with screws at designated connection points. I anchor the transition to wood, concrete, or asphalt using pre-drilled holes. For soft or uneven ground, I recommend a concrete pad for added stability. Proper anchoring is key, especially in high-traffic or sloped areas. Done right, this final step ensures long-term safety and comfort for all ramp users.
Safety Considerations for Aluminum Wheelchair Ramp Installation
Safety is crucial in aluminum wheelchair ramp installation. Installers must ensure compliance with ADA standards and manufacturer guidelines to protect users and maintain warranties. Identify hazards like tools, obstructions, or unstable sections, marking them immediately with cones/tape. Follow the installation manual meticulously for anchoring, weight limits, and railings. Use a torque wrench to tighten all bolts/screws to specified levels; loose connections risk structural failure. Double-check all components before completion. Prioritizing these steps ensures durability, safety compliance, and user protection.
Summary
I suggest taking the time of your aluminum wheelchair ramp installation properly. Once you do, you have a safe and reliable way to access places. Based on my experience, these ramps last for years and require very little maintenance. It makes me proud when a ramp is installed the right way. I know it makes things safer. It also gives people with mobility challenges greater freedom. I believe putting in the time and care during installation pays off. This effort leads to dependable, worry-free access down the road. For me, the most rewarding part is seeing someone confidently use a ramp that was installed with care.