
How to preventing surgical site infections in the operating room?
A single lapse in sterile technique operating room protocol—a skin prep that didn’t fully dry, a door propped open during instrument setup, a prophylactic antibiotic given twenty minutes too late—can undo everything else your team did right that day. And when that happens, the surgeon usually gets asked “what happened in the OR?” long before anyone checks the recovery floor.
That’s the gap this guide closes. Each phase pairs common mistakes with the correct protocol, backed by current CDC and WHO benchmarks. You walk away with a role-by-role checklist you can print, post, and audit against tomorrow.

Assign SSI Prevention Responsibilities Before the Patient Enters the Operating Room
Nobody prevents an infection by accident. Every pre-op step needs an owner, a deadline, and a way to verify it happened before anyone wheels the patient through the OR doors.
Patient prep (nursing/pre-op team):
– Patient bathes or showers with soap or antiseptic the night before surgery. For patients over 2 months old, some guidelines call for 4% chlorhexidine cloths or soap the night before and the morning of surgery.
– If hair removal is needed, use electric clippers immediately before surgery—never a razor. Razors nick skin and let bacteria in.
– Clean the surgical site with a dedicated antiseptic agent as part of standard preoperative skin antisepsis.
Risk stratification (surgeon/anesthesiologist):
– Classify the patient as low, medium, or high SSI risk based on procedure type and surgical wound classification. This determines whether extra steps—like nutrient-enhanced formulas for underweight patients, or mechanical bowel prep plus oral antibiotics for elective colorectal cases—get added to the plan.
Antibiotic prophylaxis timing (anesthesia/pharmacy):
– Administer within 60 minutes before incision (before skin incision for C-sections specifically), and stop within 24 hours post-op.
Surgical team hygiene practices:
– Scrub hands and arms to the elbows with antiseptic for 2–5 minutes before the day’s first case.
– Confirm hair covers, masks, gowns, and gloves are on before scrubbing in.
Hospitals should verify this competency at hire and annually, then audit compliance with feedback loops to surgeons and staff.
Complete Patient Preparation and Risk Assessment Before Skin Incision
The WHO Surgical Safety Checklist exists because memory fails under pressure. It is built around 19 core safety checks split into three moments: Sign In, Time Out, and Sign Out. The checklist forces the team to stop and verify what should be obvious, right when obvious things start slipping.
Time Out, immediately before skin incision:
– Confirm the correct patient, correct site, and correct procedure out loud with the full team present.
– Each team member states their name and role.
– Nurses confirm instrument sterility and flag equipment issues before anyone picks up a scalpel.
– Display relevant imaging if the case calls for it.
Blood loss risk check:
– If expected loss exceeds 500 mL in adults or 7 mL/kg in children, place at least two large-bore IV lines (or a central line) before incision. Stage fluids and blood products and have them ready. Do not request them mid-crisis.
Skin assessment before prep:
– Document skin integrity at the operative site. Look for breaks, abrasions, sores, moles, and rashes.
– Check proximity to eyes, ears, and mucosa.
– Factor in patient age (neonates need gentler agents), skin tone (affects prep visibility), and hair density near the draping area.
– Confirm no allergy or contraindication to the antiseptic agent chosen.
Administer Surgical Antibiotic Prophylaxis at the Correct Time
Most teams get antibiotic prophylaxis timing wrong in one of two ways: start too early, and levels drop before the first incision. Start too late, and the drug never reaches peak concentration when bacteria first hit the wound.
Documentation: log drug, dose, start time, incision time, and infusion completion time for every case. Stop prophylaxis at wound closure or within 24 hours. Cardiothoracic cases can extend to 48 hours. Clean and clean-contaminated procedures don’t need extra doses after closure, even with a drain in place.
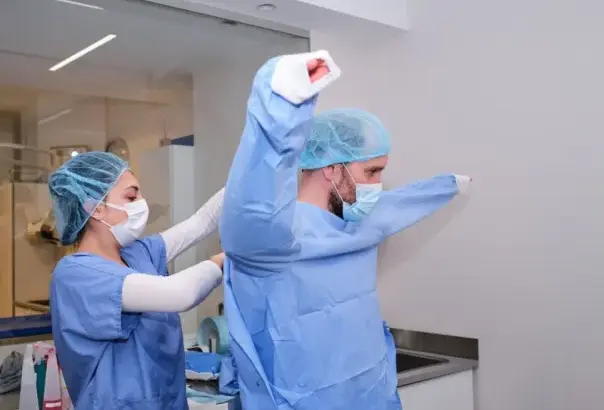
Perform Surgical Hand Antisepsis, Attire Checks, and Sterile Setup surgical table
Jewelry stays in the locker, not on the hand. That’s the first check, every time, before anyone touches soap or scrub solution.
Attire, before antisepsis begins:
– Short-sleeved top tucked into trousers, hair fully covered, surgical mask on.
– Confirm hands and nails are visibly clean; use a single-use nail pick or brush on subungual areas if needed.
– If hands or forearms are soiled, wash with soap and water first.
Antisepsis, two accepted methods:
– Antimicrobial soap: scrub hands and forearms 2–5 minutes, per manufacturer instructions.
– Alcohol-based hand rub: apply after cleaning and drying, rub until completely dry.
Rinse and dry:
– Keep hands higher than elbows, rinse fingertips toward elbows.
– Dry thoroughly with a sterile towel before gowning.
Sterile setup checkpoint: prepare the sterile field first, then place supplies on it using aseptic non-touch technique. Required at the station: hands-free sink, running water, pre-packaged scrub kit, sterile towels, sterile gloves. For back-to-back cases, wash before the first operation; ABHR or antiseptic wash covers subsequent ones.
Apply Preoperative Skin Antisepsis and Let It Dry Completely
A quarter of alcohol-based preps ignite if someone drapes before the field dries. That statistic alone should end any debate about rushing this step.
Drying benchmarks by product and site:
Alcohol-based CHG: minimum 3 minutes before draping or using any ignition source.
Povidone-iodine: 10 minutes for full antimicrobial effect.
Dry sites: apply in back-and-forth strokes for about 30 seconds.
Moist sites (inguinal fold, axilla): about 2 minutes, minimum 1 minute.
Hair, folds, or pooled prep: up to 1 hour—pooling is the biggest fire-risk factor, igniting at time zero in testing.
Common mistake: waiting the standard 3 minutes without checking for visible pooling. Testing showed that alone doesn’t cut ignition risk—the prep has to actually look dry, not shiny, with no wetness anywhere near the site.
Correct practice: inspect the field before draping. Never blot or wipe toward the incision. Alcohol-free preps sidestep the fire risk entirely but still need full drying to work.
Maintain Sterile Technique and Protect the Incision Throughout the Procedure
Sterility isn’t a one-time setup. It has to hold for the entire case, every minute the incision is open.
Draping and field boundaries:
Drape outward from the incision site to establish the sterile perimeter. Sterility must hold from the moment the first drape opens until the patient leaves the OR.
The prepped skin zone should extend beyond the drape opening—wide enough to cover any drain sites, extended incisions, or drape shifting mid-case.
Only the prepped incision site counts as part of the sterile field on the patient’s body. Everything outside that boundary stays contaminated by default.
Movement and contamination rules:
Sterile touches sterile. Contaminated touches contaminated. Never let the two cross.
Keep hands inside the sterile field, above table height, away from the face and below the waist. When stepping back from the field, hold hands together at mid-chest.
Set up the sterile field as close to use-time as practical. Every extra minute it sits open is more time for airborne contamination to settle in.
When contamination happens: Change gloves immediately. Anything that touches the surgical site has to be sterile—no exceptions, no “it probably didn’t touch anything.”
Control Operating-Room Traffic, Air Quality, and Environmental Contamination
Every extra body in the room is a variable you didn’t need. Airborne microbial levels climb with each person moving through the OR, and studies tying limited traffic to lower coagulase-negative staphylococcal infection rates back that up with hard numbers.
One teaching-hospital study measured mean intraoperative airborne contamination at 328 CFU/m³, with 84% of samples exceeding 180 CFU/m³. In empty ORs after an hour of undisturbed ventilation, the mean dropped to 39 CFU/m³. People and door openings drove that gap. CFU levels tracked with headcount (P = 0.001) and door-opening frequency (P = 0.02).
Operating room air quality standards to hit:
– ≤180 CFU/m³ during active surgery, 35 CFU/m³ when idle
– Minimum 15–20 air changes per hour, with 4–20% fresh air
– Positive pressure relative to the corridor at all times
Traffic-control bundle for the circulator to own:
– Close the door once the patient is intubated. Don’t prop it open for “just a minute.”
– Cap the headcount in the room and stagger entries and exits.
– Post visible signage that doors open only for essential passage.
– Keep instrument tables clear of the traffic path.
– Cut unnecessary talking and movement near the sterile field.
An orthopedic quality-improvement project used staff education, break reduction, and door rules to measurably cut room traffic, proving this isn’t just theory.
Manage Temperature, Oxygenation, Glucose, and Medication Safety During Surgery
Four numbers determine whether the body’s own defenses hold up during surgery: core temperature, oxygen delivery, blood glucose, and every drug that touches the sterile field. The anesthesia team owns this checklist, and none of these targets are negotiable.
Temperature and oxygenation:
– Keep core temperature ≥35.5°C for any case with anesthesia lasting 60 minutes or longer. Below 36°C counts as hypothermia, so use forced-air warming and continuous core temp monitoring to stay ahead of it.
– For intubated general anesthesia, deliver 80% FiO2 intraoperatively and continue for 2–6 hours post-op when feasible. This single step measurably reduces SSI risk.
– Track SpO2 above 95% continuously, and add capnography (ETCO2) for any patient at risk of respiratory depression.
Glucose control:
– Target range: 140–180 mg/dL. Treat anything at or above 180 mg/dL.
– Cardiac surgery patients need glucose ≤180 mg/dL for at least 24 hours post-op, often via insulin infusion started in the OR.
– Hold sulfonylureas and insulin secretagogues the day of surgery. Adjust long-acting insulin to roughly 80% of the usual dose the night before and day of.
Medication safety on the sterile field:
– Reconcile home medications before the patient enters: name, dose, route, last dose taken.
– Apply the six rights every time: drug, dose, route, time, patient, documentation.
– Use sterile technique whenever a medication touches the sterile field.
Complete the WHO Time-Out and the Postoperative Handoff as Infection-Control Checkpoints
Two checklist moments carry the infection-control weight of the entire WHO Surgical Safety Checklist: Time Out and Sign Out. Skip either one, and the 19-item system loses its teeth.
Time Out (7 items, right before incision):
– Whole team stops. No side conversations, no instrument prep, nothing else moving.
– Confirm correct patient, procedure, and site out loud.
– Confirm patient positioning and that implants or special equipment are on hand.
– Verify prophylactic antibiotics were given within the past 60 minutes. This is the last chance to catch a missed or late dose before it costs someone an infection.
– Display essential imaging if the case needs it.
Sign Out / postoperative handoff (5 items, before the patient leaves the OR):
– Complete instrument, sponge, and needle counts. A retained item is a guaranteed infection risk.
– Confirm specimen labeling.
– Review wound status, drains, and antibiotic timing one more time.
– Hand off recovery concerns to the postoperative team before the patient exits.
Convert the Operating-Room SSI Protocol Into a Printable Audit Checklist
Everything above works only if someone can score it in real time. The one-page audit tool combines chart audit with direct observation, using Yes/No/N/A fields so every auditor scores the same way.
Pre-op grid: patient bathed, hair removal method (clipper only), antibiotic name/dose/route, start time relative to incision, skin prep agent used.
Intra-op grid: hand antisepsis confirmed, sterile technique maintained, normothermia Y/N, glucose <200 mg/dL Y/N, redose required Y/N, instrument sterilization verified.
Post-op grid: dressing applied and duration, saline-only cleansing up to 48 hours, antibiotics stopped at closure even with a drain present.
Model this on the CDC NHSN format—criterion met, date of event, procedure of attribution—or the 19-item WHO checklist with sign in, time out, sign out. Either structure prints clean and posts easily.
Conclusion
SSI prevention is about a hundred small, correctly timed actions stacking up across three phases: prep, procedure, and handoff. Get antibiotic timing right. Let the skin antiseptic fully dry. Keep OR traffic and airflow disciplined. Miss any one link, and the chain breaks.
That’s why the role-by-role checklist in this guide matters more than another lecture on sterile technique in the operating room. Print it and post it near the scrub sink. Hand it to every new circulator, resident, and scrub tech before their first case. Show them the checkpoints in black and white.