
A surgical table that refuses to move, or drifts on its own, can turn a scheduled procedure into a scramble. Every minute your team spends guessing at the cause is a minute the OR can’t afford to lose. This guide walks biomedical engineers and facility maintenance teams through surgical table troubleshooting step by step, from power and battery checks to lift mechanism failures and positioning errors.
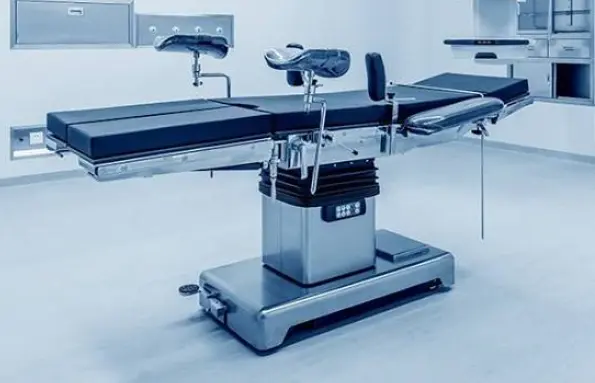
Make the Surgical Table Safe Before Troubleshooting
Skip this step and you’re gambling with more than downtime. AAMI puts it bluntly: an unsupported table can “crush and maim” if you skip proper support precautions. So before troubleshooting any electrical or hydraulic issue, clear the patient off the table and make sure it’s supported.
Cut power completely—wall plug, control battery, motor battery positive terminal.
Quick pre-check:
– Patient removed, table supported
– Power disconnected
– Brakes secured
– Load within rated limit
– Persistent fault? Tag it out and call technical support.
Confirm the Power Supply and Battery Condition
Dead batteries cause more “surgical table electrical failure” calls than any wiring fault. Test smart.
After letting the battery rest, put your DC multimeter directly on the battery posts, not the cable clamps. A healthy 12V lead-acid battery reads 12.6V–13.2V at idle. Readings between 12.0V and 12.5V are a warning. Below 11.5V, plan on replacement. Under a 50–70% load test, voltage should hold above 11V for five-plus minutes. Anything that drops below 12V under load is wearing out. For lithium packs, expect between 3.7V and 4.2V per cell.
Check charging voltage and float current against the spec. Inspect terminals for corrosion or swelling. Log everything. Trend data catches failures before they strand a table mid-procedure.
Release Emergency Stops, Locks, and Safety Interlocks
Nine times out of ten, a surgical table that seems dead is still latched. Someone hit the E‑stop during a prior case and nobody reset it. Check the mushroom button first. Most reset by twist‑to‑release or pull‑to‑release; a smaller number use key‑release for restricted access.
Safety interlocks hold the table in a stopped state until a guard or access panel is closed. That’s by design. Look for a manual override or auxiliary release, often paired with 2NC+2NO contact blocks, for situations where the lock itself has failed. Confirm the interlock relocks before you clear the table for use again.
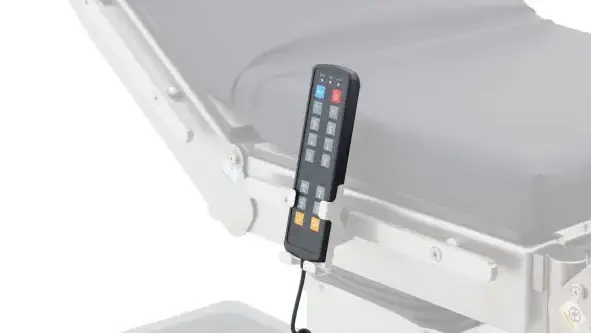
Test the Hand Control, Foot Control, and Remote Connections
A control panel that “just stopped working” often has nothing wrong with the panel itself. The problem lives in the wiring between it and the table.
De-energize the circuit and lock it out before touching anything. Insulation resistance on control wiring should sit at 1 megohm minimum—clean new wiring typically reads well above 100 megohms. Protective-circuit continuity should stay under 0.1 Ω.
Inspect terminations next. Look for proper torque, secure lugs, correct bend radius, and no pinched or exposed conductors.
For pairing failures on wireless remotes, try pairing the unit by pressing “head up” plus “foot up” together. Confirm success by listening for relay “tick” feedback on head up/down and foot up/down commands.
Foot switches often wire to pin 7 (RTS) plus pin 8 (CTS) or pin 1 (DCD), with 100 nF debouncing between GND and the input pin. Verify that circuit if the pedal feels unresponsive.
If the table runs on networked remote control, test from the local Wi-Fi network first to confirm port forwarding or DynDNS setup. Then retest from cellular data to rule out network-side faults.
Diagnose a Surgical Table That Will Not Start
Silence from the table doesn’t always mean disaster. Start with the boring stuff. Confirm the main switch is on. Check the mains power cable is seated in the inlet. Verify the hand control and foot control are fully connected—half-seated connectors cause more no-start calls than most techs admit.
Work the outlet next. Plug in a lamp to test the facility outlet. If the lamp doesn’t light, check the facility circuit breaker. Reset it if tripped, but find out why it tripped before you reset anything. Confirm the outlet is grounded, non-isolated, and correctly polarized. Wrong polarity has fried more than one controller board.
Fuses die quietly. Check the AC power inlet fuse and any battery fuses before assuming a bigger fault.
Once power’s confirmed, split the diagnosis. Does the table fail on every function, or just one? All-function failure points to a power or controller board issue. A single dead function usually means one solenoid, valve, or circuit, not the whole system.
Intermittent faults get their own branch. Don’t chase phantom errors with a multimeter alone. Wiggle-test cables and connectors under load. Loose crimps show up intermittently long before they fail completely.
Troubleshoot Lift and Elevation Failure
A table that won’t raise almost always traces back to five suspects: power supply, motor or contactor, a blown fuse, an engaged E-stop, or the hydraulic system. Run through them in order before touching anything else. First weigh the patient load—confirm it’s within rated capacity, because an overloaded table won’t lift no matter what else you fix.
Hydraulic Lift Won’t Lower
Unload the table, then check hoses and fittings for visible leaks. Give it a short UP command followed by DOWN. If it still won’t drop, wait 10–15 minutes for pressure to equalize. Once it’s fully lowered, hold DOWN for about 60 seconds to bleed trapped air from the lines.
Check oil condition while you’re in there. Milky oil means water contamination or aeration. Black, thick oil means the fluid has degraded. Foamy oil points to aeration, a suction leak, or a low reservoir.
Battery and Electrical Lifts
Check the charge indicator, cable ends, and terminals for corrosion or looseness. On a 24V system, any reading below 20V during a lift attempt points at a battery or supply fault, not the motor.
Mechanical and Sensor Checks
Inspect pivot pins, bushings, scissor arms, and locking mechanisms for wear or binding. Pull diagnostic error codes and test joystick response. A table that stops slightly above or below the intended position usually has a misaligned floor sensor, not a mechanical fault.
If movement is uneven, the table binds, drifts, or fails to lock—stop and escalate to service.
Troubleshoot Longitudinal Tilt, Lateral Tilt, Back, and Leg Movements
Check for asymmetry first. Run the table through full tilt range—longitudinal, then lateral—and watch both sides against a level or reference mark. One side dropping faster than the other signals a surgical table positioning error, usually tied to a failing actuator or a sensor drifting out of calibration on that specific axis.
Check back and leg sections separately. Move each section alone, not in combination. If the back section lags behind the leg section during a synced motion, the problem is on that side’s motor or gearbox. Cross-check against the other function—if lift and Trendelenburg work fine but lateral tilt sticks, you’ve narrowed the fault to that circuit alone.
Calibration drift causes more silent failures than actual OR table malfunction.
If asymmetry persists after recalibration, the actuator needs replacement.
Interpret Error Codes, Sensor Faults, and Control-System Alarms
Five patterns explain almost every surgical table error code: open circuit, short circuit, out-of-range reading, communication failure, or a control/input mismatch. Learn these five and the alphabet soup on your display stops looking random.
Start by triaging sensor-specific versus system-level codes. Something like an E1 Auxiliary Sensor Error (OC/SC) or E2 Indoor Coil Sensor Error points straight at wiring or the sensor element. An E5 Communication Error points at the bus link, board supply, or controller power instead.
Reset behavior tells you what you’re dealing with. Many alarms clear automatically once “sensor OK” returns. Others need a manual reset or a return to normal operating range before they’ll release. Some platforms won’t fault at all until they log three faults in three hours, so a one-off blip isn’t always a red flag.
Isolation sequence:
Confirm if the alarm is active, latched, or auto-clearing
Check the sensor for disconnects, corrosion, or loose plugs
Compare readings against expected ambient values for drift
For intermittent codes, inspect vibration points and moisture exposure
A sensor fault means bad signal. A control-system alarm means the controller sees that bad signal and reacts.
Verify Repairs with Surgical Table Safety Checks
Fixing the fault is only half the job. Skip verification, and that “repaired” surgical table ends up back in the shop mid-procedure. Run every function, not just the one you touched—height, Trendelenburg, lateral tilt, back and leg sections. Movement should be smooth and quiet; grinding or hesitation means recheck, not sign-off.
Test casters next. They should roll freely when released and lock securely under load. Confirm brake traction on a level floor.
Before re-energizing, inspect power cords, hand pendants, and footswitch cables for wear. Check ground continuity and leakage current on any powered surgical table.
Finish with a visual check: labels legible, upholstery intact, arm rests and rails mounted tight. Document the full check—that log is your defense if the same fault resurfaces.
Planned Maintenance Prevents Recurring Operating Table Problems
Most surgical table failures don’t happen overnight. They build over months of skipped checks and deferred lubrication. Tables used heavily in the OR need maintenance at least every six months—annual full service alone leaves too much time for wear to snowball.
Target the parts that fail most often: hydraulic seals, actuator end-stops, caster bearings, and limit switches. These show the highest repeat-failure rate in service logs.
Set up the schedule in layers:
– Daily: clean quickly, visual inspection, function check
– Weekly: brake and lock verification, fluid level check
– Monthly: caster cleaning, bearing lubrication, full motion sweep
– Annual: electrical safety test with ground continuity and leakage-current checks per IEC 60601-1
Troubleshooting Common Surgical Table Problems
On the OR floor, start with four simple questions. Does the fault hit every function or just one? One direction or both? Is it intermittent? Does the table not move at all, or does it move but won’t hold position? Answer those first.
Why won’t the back section raise? Check the kidney bridge. On Skytron tables, a raised kidney bridge trips a safety interlock that blocks the back-up function. Lower the bridge, then retry.
Why is one movement blocked while others work fine? Usually a tripped safety microswitch. Check the switch condition before you grab a wrench.
Why is one pendant button dead? Start with the hand control connection. Test cable and connector continuity with a meter before you condemn the pendant.
Why does the table feel wobbly under load? Check the floor locks, section locks, and worn bearings first. Excessive play is a documented breakdown sign, not normal wear.
Why won’t batteries charge? Make sure the main power switch is on. A switched-off table won’t charge no matter how long it sits plugged in.
Conclusion
A malfunctioning OR table threatens surgical timelines and patient safety, not just your schedule. The good news is most failures follow predictable patterns. Power and battery checks, control system tests, and careful inspection of the lift mechanism resolve the vast majority of issues before they turn into costly downtime.
The real skill is knowing when a problem is safe to fix in the field and when you need certified technical support.